Checklists are essential for getting things done (especially for repeated tasks). A few weeks back, Kishen shared about the Process Street checklist app & this is where the idea to add a checklist for our premium members came into my mind.
We started creating checklists for our premium content at pro.shoutmeloud.com so that our members can keep track of tasks when learning about making money from their blog.
The checklist can also be used as a content upgrade & I’m sure you have heard about the importance of content upgrades for list building. Content upgrades can perform magic for your list building efforts, and you may now be considering joining the bandwagon and creating your own content upgrades so you won’t be left out.
Content upgrades can boost the size of your email list, but if you mistakenly create the wrong one, it will amount to nothing.
Among all the different types of content upgrades on the internet, checklists have been the most popular and most widely used form of upgraded content. Go to any prominent blog that offers content upgrades and you will find out that checklists are particularly prominent.
Therefore in this post, I will be sharing with you how to quickly create a checklist for your next content upgrade.
How to create a clickable checklist in .pdf format
We will be using the popular Microsoft Word to create our checklist; I find it to be the easiest.
Let’s follow the steps below:
Step 1: Launch Microsoft Word
(I’m sure you already know how to open Microsoft Word on your computer.)
Once it’s open, you can now proceed to the next step.
Step 2: Enable Developer Tab
First of all, before you can create a checklist with Microsoft Word, you need to enable the developer tab.
To do this, you simply need to click on the “File” drop-down menu located at the upper left side of Microsoft Word, then click on “Options”.
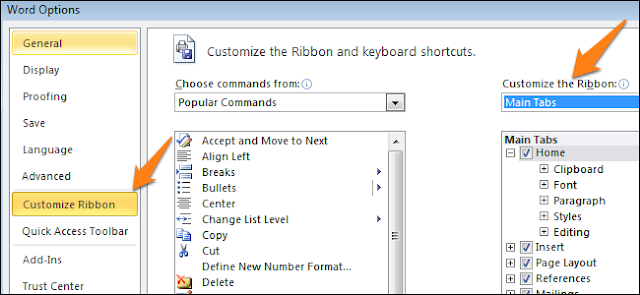
Next, select the “Customize Ribbon” tab from the list and select “Main Tabs” under“Customize the Ribbon”.
Check the screenshot:
Step 3: Select the Developer Tab
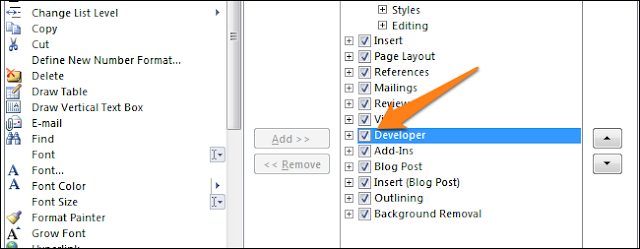
Once you’ve gone through this stage, the next thing is to select the “Developer” box and press “OK”.
Check the screenshot:
When you’re through with this, you will find out that you have an additional tab called“Developer” added to the Quick Access toolbar:
Step 4: Add Checkbox to your Checklist
The next thing is to start creating your checklist and adding checkboxes to it.
To do this, simply write down your checklists and then add checkboxes to them.
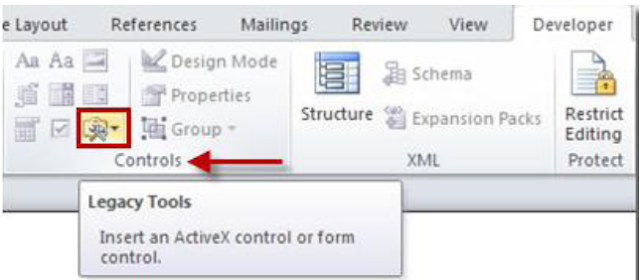
First, click on the “Developer” tab:
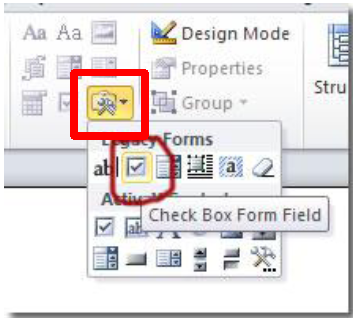
Then, select “Legacy Tools”:
When you click on “Legacy Tools”, you will see a drop down with many more panels. On the panels that appear, click on the “Check Box Form Field”:
Once you click on that, you will see the checkbox appear on every point you’re adding to your checklist (depending on the location you want it to be).
Remember, you have to keep clicking on it so it will appear on all of your points. Just place your mouse before the point and click the “Check Box Form Field” and it will appear there.
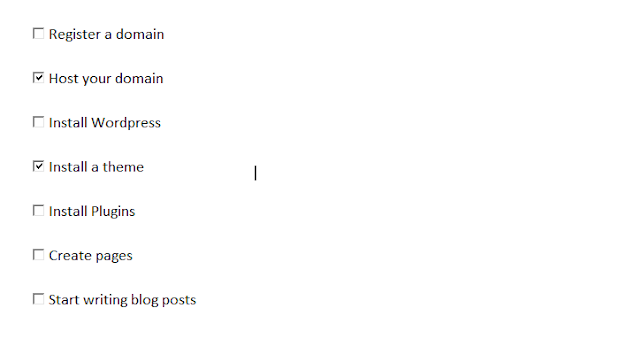
Example:
Blogging Checklist
As you can see, we’re already done creating our checklist.
After you’ve followed and applied all of these steps, you will need to click on “Design Mode” also located on the “Developer” tab so you can check and uncheck the boxes.
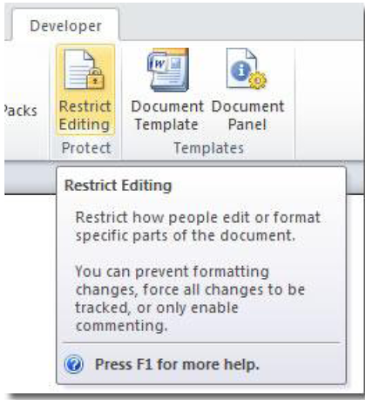
Finally, you can also protect your checklist so that no one can edit it (apart from filling in the form and checking the boxes).
To do this, you need to click on “Restrict Editing” in the “Protect” group located on the“Developer” tab:
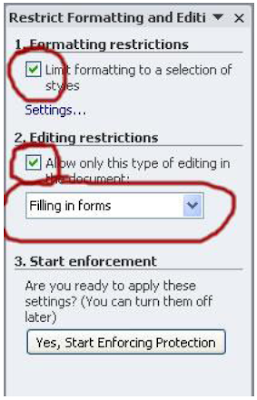
The “Restrict Editing and Formatting” window will show on the right-hand side. Here we will have to check the boxes for “Formatting restrictions”, “Editing restrictions”, and also select “Filling in forms” in the drop-down list:
Once all of this is done, just click on “Yes, Start Enforcing Protection”, and your checklist will be fully protected.
How to Convert Your Checklist to PDF
Now that you’ve finished creating your checklist, the next step is to convert it to pdf so you can now start sharing it with your readers. Follow the steps below to do this.
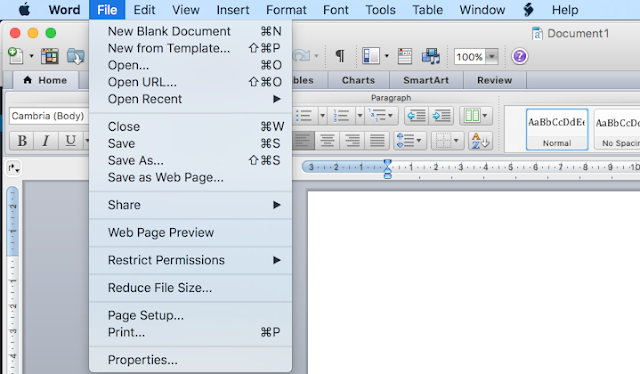
1. Click on the office/File button located at the upper left side of your word document as you can see on the screenshot below.
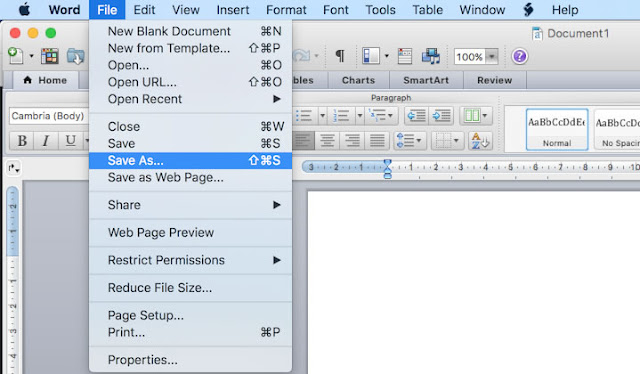
2. Once you click on the button, it will display options for you to choose, and once you’re there, you want to select Save as from the options.
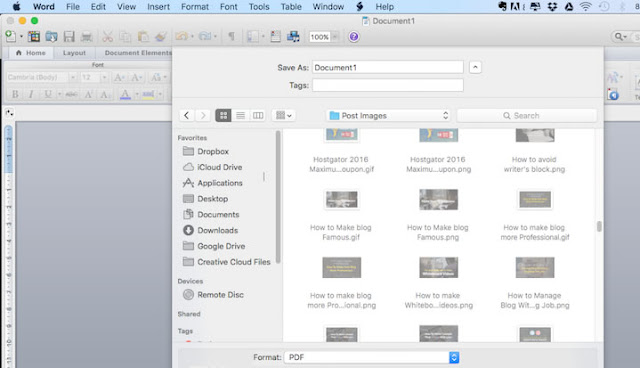
3. When you click on the Save as, it will still bring up more options and from the list, select PDF or XPS and a dialogue box will pop up.
From the above screenshot, what you want to do is give your checklist a name, select the folder you want to save it and, click the publish button. Your checklist will now be converted to pdf and saved in your desired folder.
There you go! Start enjoying your new checklist!
If you have any questions, don’t hesitate to ask in the comments section, and I will be here to answer you.
Source......shoutmeloud



0 comments:
Post a Comment